RC Stuff
How to Set Up Flytrex Core 2 with DJI Naza-M v2

Aug
I recently purchased a Flytrex Core 2 for my F450 and documented the installation process and experience. I thought it would be helpful for others to share what I learned so that when you set up your Flytrex Core 2 it will be a much better experience.
Overall I found that the Core 2 installation was extremely easy, it really is a 30 second installation just like their manual states. The biggest time consumer is finding the ideal spot and wiring all the cables.
I probably spent more time figuring out placement for the component than I did installing it.
Determine Mounting Location
The instructions here differ from the official manual because I think that Flytrex Core placement should be determined before wiring everything, I also wrote this specific to the Naza-M flight controller.
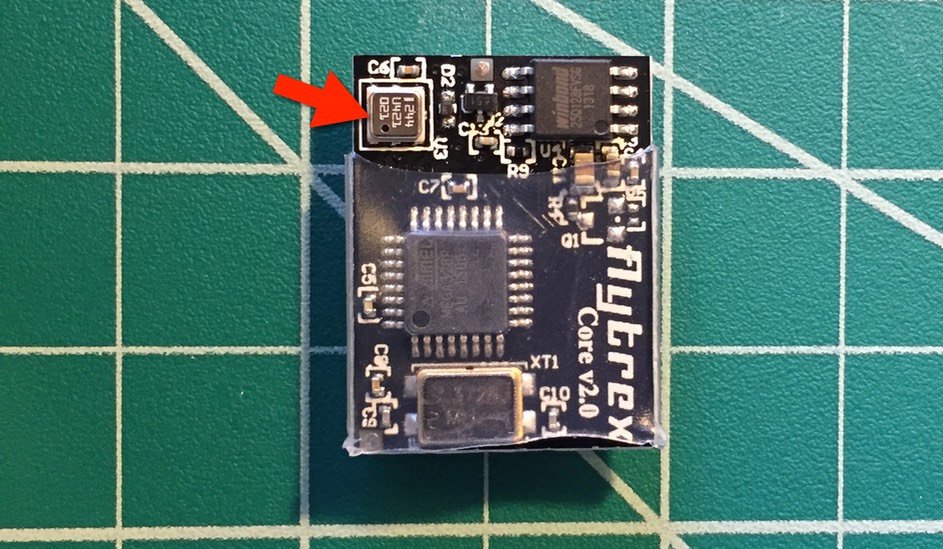
Without proper placement, the barometer on the Core may not register accurate readings. The key thing to remember is to place the Core in a way that the barometer hole (picture below) is not exposed to direct sunlight, but remains exposed to a minimum amount of airflow.
In other words, mount the core so that the side with the barometer is facing the mounting surface on your aircraft (helps keep direct sunlight out).
In summary, keep the following considerations in mind when mounting the Core:
- Keep direct sunlight from barometer
- Allow minimal amount of airflow to reach barometer
- Air gap between barometer and mounting surface
- Easy access to Micro SD card to pull flight logs after flights
- Distance from PMU CAN port, GPS plug and Flytrex Core mounting location
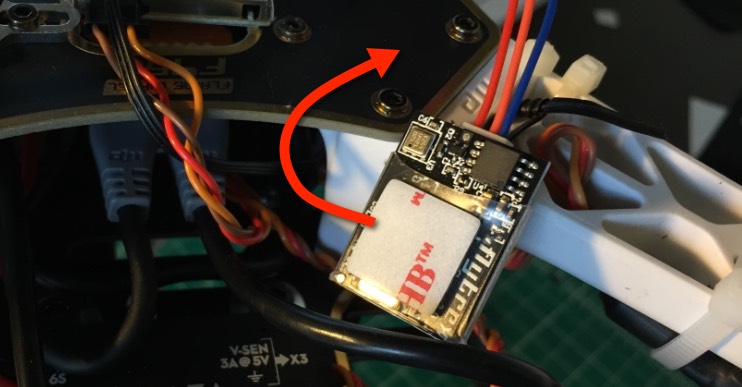
The included 3M double-sided strip provides enough of a gap when placed on the (part/picture), this would also apply to a piece of velcro if used instead.
As you can see I used the double-sided tape and placed the Flytrex Core on the top deck of the F450 frame. I used the fastener head to also support the gap between barometer and the mounting surface.
Wiring Flytrex Core 2 and Naza-M V2 GPS
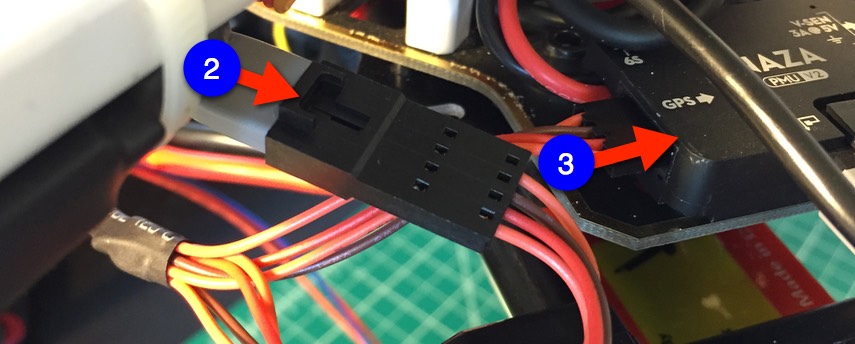
- Disconnect the GPS from the Naza PMU GPS port
- Connect the GPS to the Flytrex female socket (this is the only female available)
- Connect the male socket (the one that resembles the GPS you just unplugged into the GPS socket)
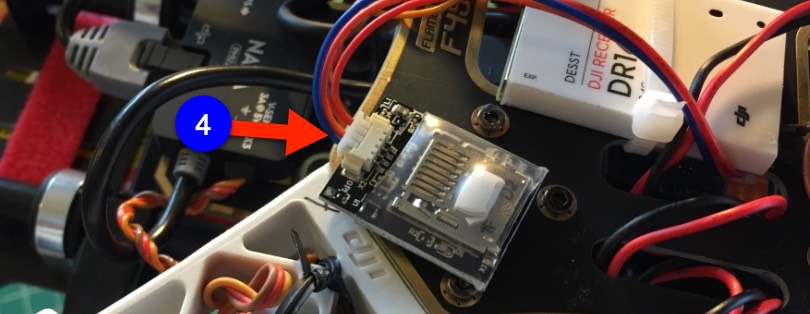
- Connect the remaining cable to the Flytrex Core slot
Mount & Power Up the Flytrex Core
Assuming you’ve selected a mounting location and you’ve wired everything up, mount the Flytrex core and insert a MicroSD card into the memory card slot.
Note: Memory card is optional since the Flytrex Core 2 includes built-in memory for those instances you forget to insert the card and take off.
Whether you are planning to use the built-in memory or a MicroSD card, the next step should be to power up the aircraft which will power up the Flytrex Core.
Once you’ve confirmed proper operation head outside and go log some flights!
How has your experience with the Flytrex Core 2 been? Did you have any installation issues and/or recommendations? Please share below.