
May
After mastering the Dromida Ominus and growing tired of the lack of thrust, I set out to build my own quad. After weeks of research I narrowed my choice down to the Flamewheel, aka F450 kit by DJI.
Below you will find a listing of the parts and tools needed to put this quad together. You will also find general guidelines along with pictures during the build process.
I hope you find this useful and the tips provided below can help you avoid some of the issues I encountered when putting this quad together.
Sourced Parts
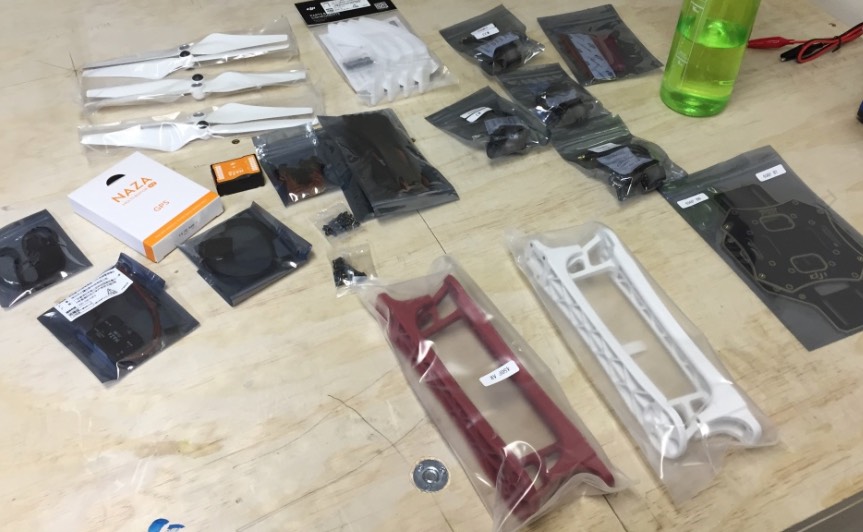
- F450 ARF Kit
- Landing Gear
- Naza M V2 Flight Controller
- DJI DT7 / DR16 RC System
Tools & Other Parts Used
- Solder iron
- Screwdrivers
- Pliers
- Solder
- Lots of tie wraps
The Build
Before you set out to build your quad, the first thing you need to do is ensure that you have all the parts and tools necessary to finish your build.
Once you’ve confirmed your parts list, the first thing you should do is solder the ESCs to the power distribution board (the bottom section of bottom board).
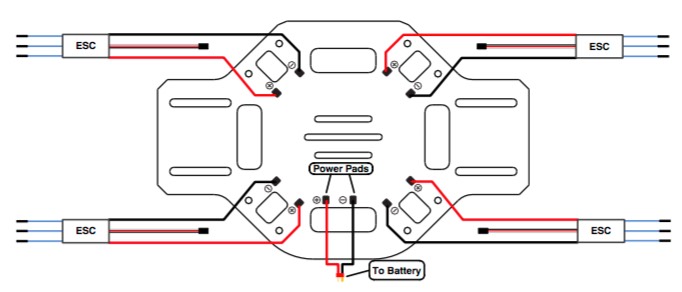
At this time you should also solder the power connector you will use (depends on your battery connectors) and the DJI PMU.
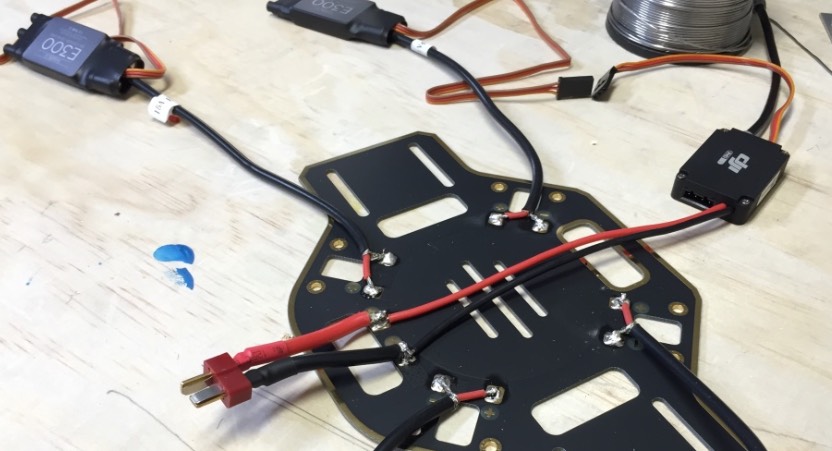
Note: Make sure to measure the length of cable required before shortening the ESC cables. They are extra long to accommodate other frames. Also, verify that you are soldering the correct polarity for each of these connection points.
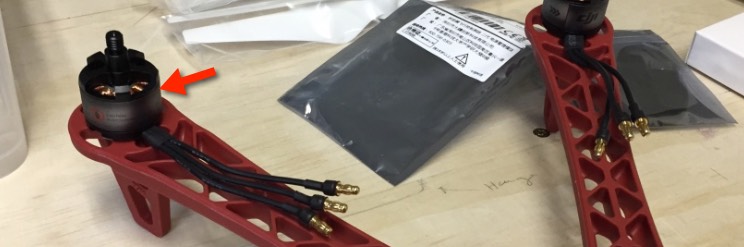
Once you’ve completed the soldering, proceed to attach the motors to each of the arms.
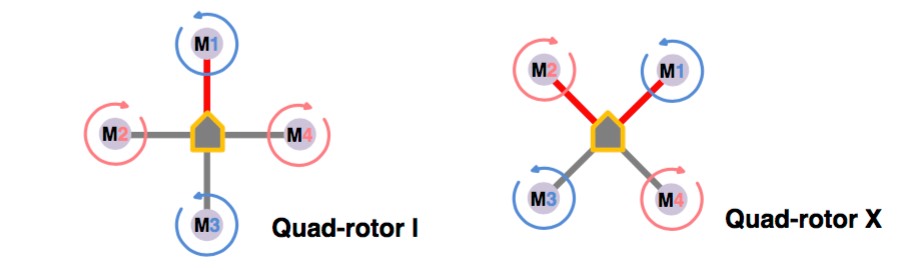
Note: In order to setup the aircraft in the correct orientation, make sure you follow the instructions on which motor goes where, see diagram from DJI manual above. The arm color (red for the front or back of the aircraft is only a preference).
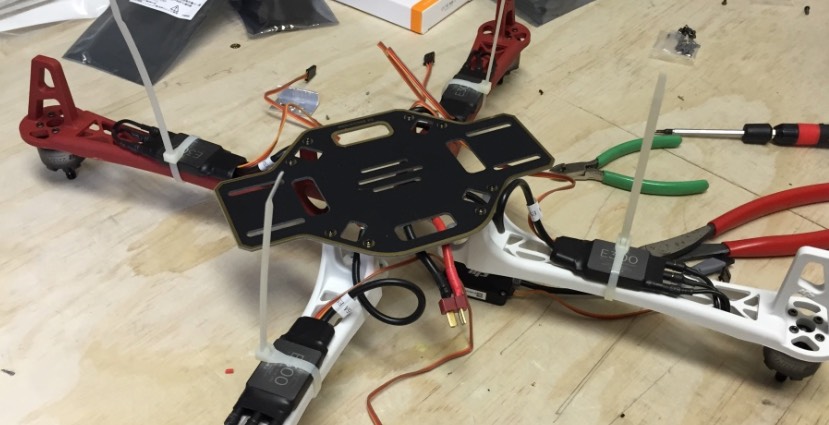
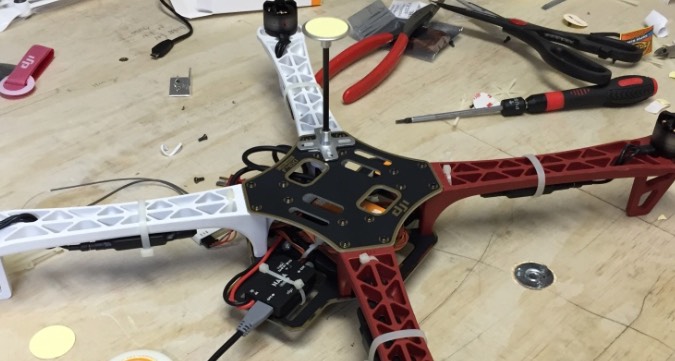
Once the motors and arms are attached, you can now secure the arms to the bottom board. I would also encourage you to start tying down the ESCs and the cables going to the flight controller.
Note: Routing cables in this step is very important since placing the top plate will make a bit more difficult without having to take the aircraft apart.
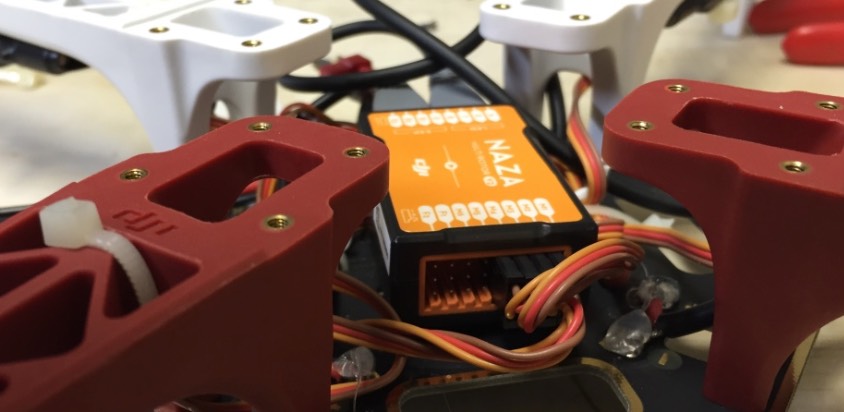
Next thing to do is turn the aircraft over and attach the Naza-M V2 flight controller to the top portion of the bottom plate. Once the flight controller is secured you can begin to plug in all of the ESCs and any other components you may have already attached to the frame.
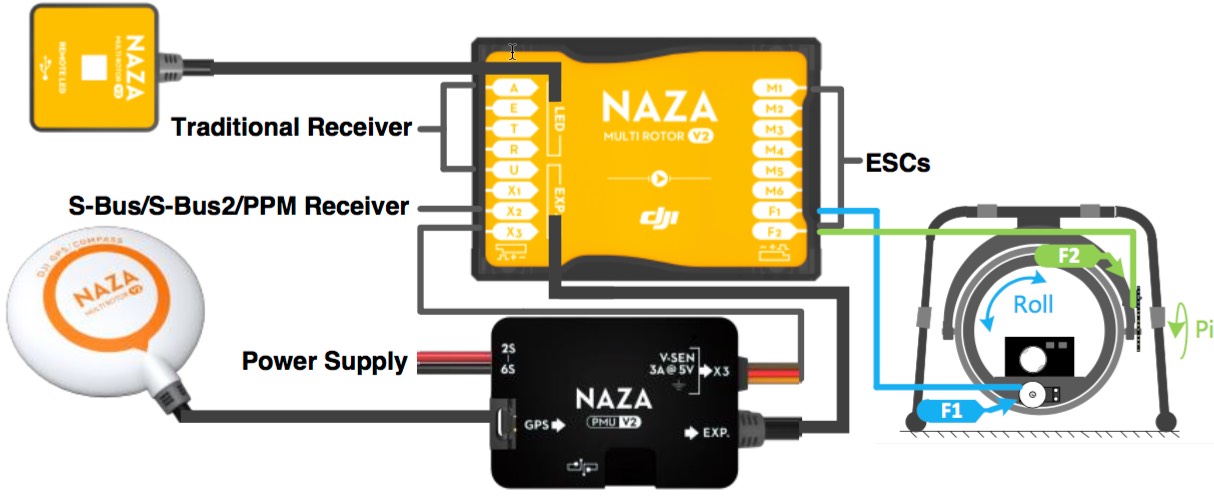
Note: Please review the diagram included in the manual to make sure everything is connected to the right port. Also, make sure that the Naza controller’s front arrow is facing the same direction as the front of the aircraft.
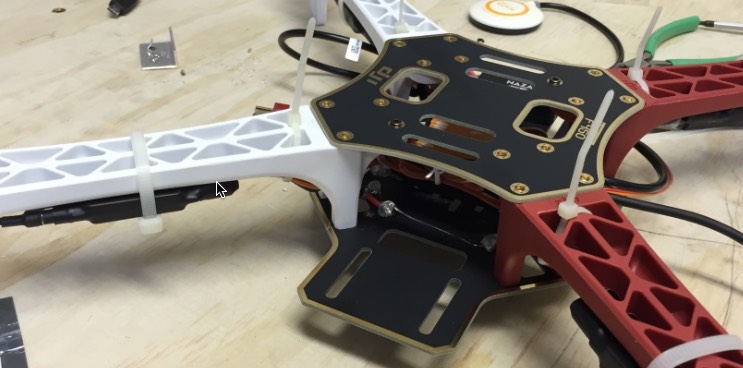
Once all the connections are made, attach the top plate to the top of the aircraft.
Next, secure the receiver, the GPS antenna, the PMU and the LED module to the frame.
After securing all of he components to the frame and verifying all of your connections you are ready to test the motors to ensure that they are installed correctly and are spinning in the required direction.
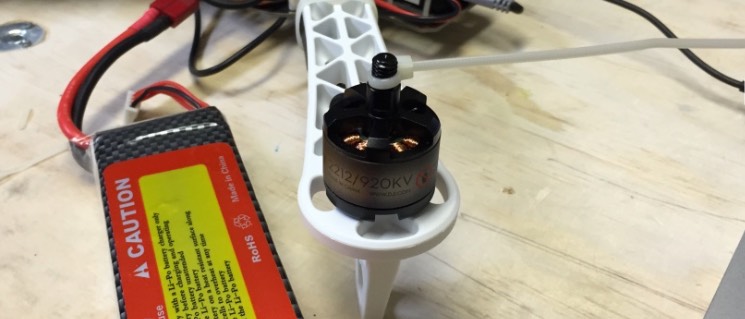
For this test all you need to is attach a piece of tape or a tie wrap like I did to the motor shaft so you can see the direction in which it is spinning. You will also need to attach a battery to your quad.
Note: Do not use the propellers for this test to avoid possible injury.
Make sure to plug the flight controller to your computer and use the Naza-M Assistant application to configure the controller.
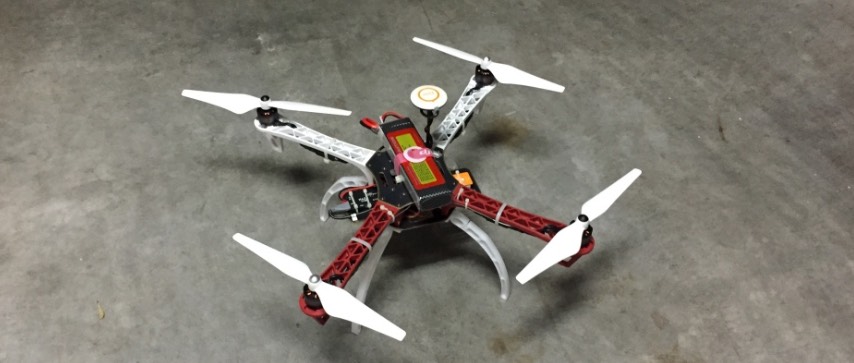
When you are done configuring the controller and calibrating the aircraft you are ready for your first flight.
What challenges did you encounter when putting together your F450? Did you run into any big issues? How did you solve them?