RC Stuff
3D Printing the OpenRC F1 Car & Sourcing Parts

Jul
If you’re looking to build Daniel Noree’s OpenRC F1 car, then this is the place to help you get started. In this series of posts I plan to document my experience 3D printing, sourcing parts and the assembly of the F1 RC car.
NOTE: This post is subject to change as I collect all of my notes and print settings. Last updated 5/26/19
Since most of the discussion here will be centered around the parts, particularly the 3D printed parts. I figured it be a good idea to start this off with an overview of the BOM.
The OpenRC F1 Bill of Materials
Before we get started let’s go over Daniel’s BOM. I’ve taken the liberty to simplify the layout of the BOM, assigning ID numbers and linking to files and places where you can obtain all the parts necessary to put your own 3D printed car together.
Save time with our ready to ship sealed bearings and the screw kits used by over 300 OpenRC builds worldwide. So if you want to save some time getting those parts together, make sure to purchase these kits from our shop.


3D Printer & Filament Used
As you can see from the BOM, you will have to print over 45 3D printed parts in order to successfully build this RC car. Thankfully Daniel did such a great job designing these parts to minimize the need for printed supports, drastically improving the print time required for most parts.
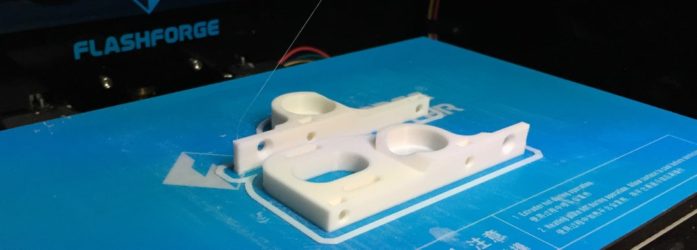
I used a FlashForge Creator Pro with a .4mm nozzle printing at .2mm layer height. For all of the parts I used 20% infill unless noted differently in the BOM list above.
My experience printing these parts is based on PLA and ABS. I successfully printed my first car in ABS and the second car in PLA. All parts printed without supports, believe that!
You’re probably wondering where’s the flexible filament? Long story short, I could not get my printers to print right…to the point that Ninjaflex took down one of my FlashForge printers…I need my printers for the business and could not afford to take another one down, so Ninjaflex will have to wait until I get or build a spare (experimentation-like) 3D printer.
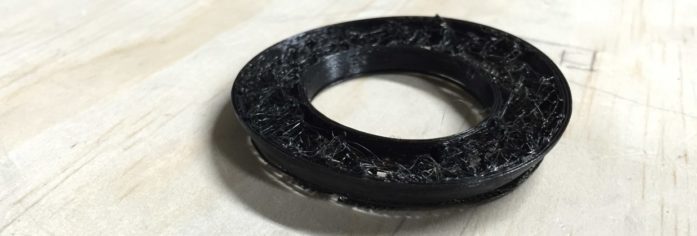 First layers continued to fail…so I could not get a tire to stick right.
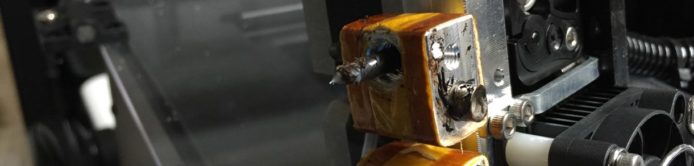
Here’s what the hot end jam looked like on the FlashForge 3D printer. Notice how the Ninjaflex just seeped through all the openings and eventually jammed. More on this later.
Challenges & Part Orientation
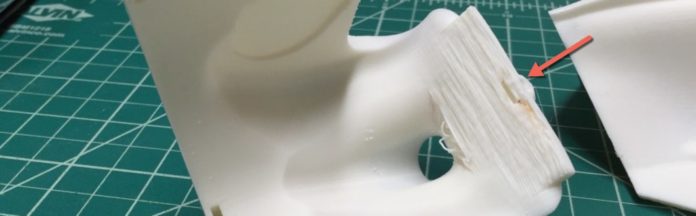
Some of the challenges and issues I encountered printing the parts centered around bridging, specifically with ABS see pictured below. I’ve listed the parts that seemed to suffer the most due to bridging with ABS.
 PLA did held up much better than ABS when bridging.
The other setting I found to be helpful was printing specific parts for the OpenRC F1 in a certain orientation to maximize part strength based on where I thought stress would be the greatest. The latter was something I quickly encountered since car A was blindly printed not knowing where it all fit.
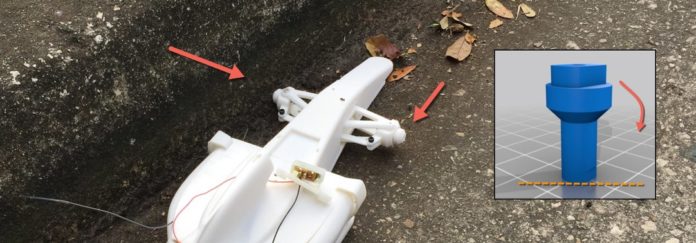 The key message here is plan your printing so that when you slice the designs they are sliced in the orientation that will provide the strongest part. Had a I printed the part picture above laying flat, it would have resulted in a stronger part and not have snapped off at the layer as pictured above.
Printed Parts Results
Below you will find a gallery of the parts we printed calling out some of the items described above.
Gallery Coming Soon
If you have any suggestions or questions about printing the OpenRC project, please post them below. Stay tuned for our next post where we will cover the assembly of the OpenRC F1 car.
Pingback: Build guides for the OpenRC F1 car by the community - Daniel Norée
Hi there! I’m using flash forge creator pro as well and would like to know what settings you used to make the nuts fit in without hassle? Good job on your successful print! Hope to hear from you!